The "MITO - Medical Imaging TOolkit" project coagulates a number of activities aimed at defining and implementing an open-source, cross-platform software architecture for advanced Medical Imaging. MITO toolkit makes it possible to fetch radiological information and images stored in a PACS according to the standard format DICOM, then provides the final user with basic functionalities such as 2D-3D visualization (VR, SR, MIP), image segmentation and fusion, ROI. Moreover, MITO provides interaction techniques for manipulating 3D medical data in a virtual environment by 2 DOF input devices.
How to connect your Wiimote to your computer via Bluetooth
MITO is able to detect a Wiimote connected to the system. To use the Wiimote as input device, first it has to be connected via Bluetooth with your PC. The Wiimote is equipped with a bluetooth controller that is designed to be used with devices which follow the Bluetooth Human Interface Device (HID) standard, such as keyboards and mice. The Bluetooth HID is directly based upon the USB HID standard, and much of the same documentation applies. First, you need a compatible bluetooth device, internal or external. If you have an external USB dongle, plug it in, install the included drivers, and restart your computer.
N.B. the Wiimote needs to track an IR led to be used as a pointing device. If you don’t have an IR led, simply put a candle or a lighter near your monitor to make the pointing work.
How to set up and connect to your Wiimote with BlueSoleil
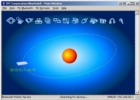
Open BlueSoleil
Press the 1 and 2 button on the Wiimote so all four of the lights blink
Make sure that the LEDs on the bottom of the Wiimote are blinking during this whole process. Since the Wiimote only stays on discover mode for several seconds, you can either hold down the 1+2 buttons the whole time or press them every few seconds.
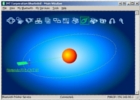
While the lights are blinking on the Wiimote click on the orange sphere in the BlueSoleil program to find the Wiimote. If BlueSoleil does not detect your Wiimote, unplug your bluetooth device and plug it back in. Then press, repeat previous step and try again. Once the orange sphere is clicked, it should find a device similar to the picture.
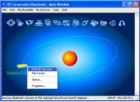
Right click the Wiimote (NINTENDO-RVT-CNT-01) that shows up and click Refresh Services. Should this not work, press 1+2 on the Wiimote and simply click on the Wiimote's icon in BlueSoleil
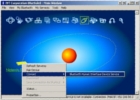
Right click on the paired Wiimote, go to Connect and select Bluetooth Human Interface Device Service. If you have never before synced a Wiimote on your computer, the program will automatically install drivers for the Wiimote. Eventually you will be asked to either Continue or Stop the installation because this has not passed Windows Logo testing. Click Continue Anyway.
A successful pairing will have a green line attached from you Wiimote to the orange sphere.